Documentation
Configure MySQL, Eclipse and Tomcat for Use with jQWidgets
In this help topic you will learn how to create a sample MySQL database and configure the Eclipse IDE and the Apache Tomcat server before creating your first jQWidgets example in the Java environment.
1. Set Up a Database
For the purposes of this tutorial, we will be using the MySQL version of the Northwind database.
- Start the MySQL Command Line Client. Then create a new database
by running the following line:
CREATE DATABASE northwind;
- Select the database for use:
USE northwind
- Finally, populate it from the file
northwind.sql
source C:/path/northwind.sql
whereC:/pathis the path to the folder you extracted the file to.
You now have the northwind database ready for use and manipulation.
2. Create a New Project in Eclipse
In this tutorial, we will be using Eclipse IDE for Java EE Developers, version Luna. You can get it from here: https://www.eclipse.org/downloads/packages/eclipse-ide-java-ee-developers/lunasr2. Run Eclipse and go to File → New → Dynamic Web Project. In the window that appears, type the project's name (we will name it "jQWidgetsJSP") and click Finish.
3. Add Necessary Classes to the Java Build Path
Several Java class packages (.jar files) are necessary for the jQWidgets
examples and have to be included in the Java build path. These are:
java-rt-jar-stubs-1.5.0.jar- contains all of the compiled class files for the base Java Runtime Environment.mysql-connector-java-5.1.34-bin.jar- MySQL Connector/J is the official JDBC driver for MySQL. It is necessary for the connection to the MySQL database.gson-2.3.1.jar- Gson is a Java library that can be used to convert Java Objects into their JSON representation.
Here is how to add these to the Eclipse project:
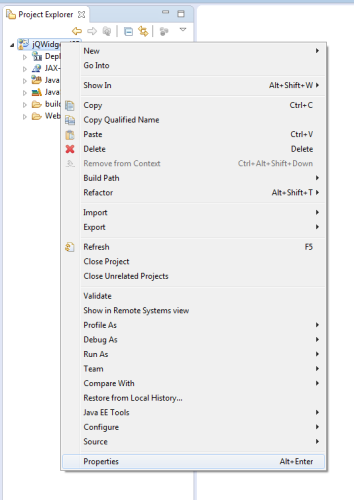
- Right-click on the project and click Properties:
- Select Java Build Path on the left and then the Libraries
tab:
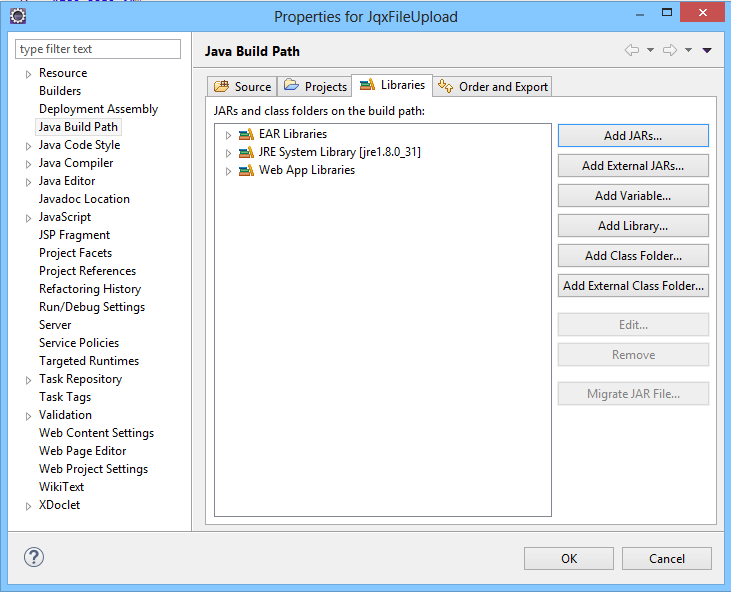
- Click Add External JARs... and browse for the aforementioned files. Note: in this case, the Java Runtime Environment classes are already present in JRE System Library and we do not need to include them again.
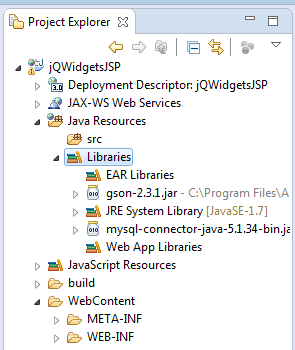
The added JARs should appear in Java Resources\Libraries and be ready
for use:
4. Add the Necessary jQWidgets Scripts and Stylesheets to the Project
Create two folders in the project folder WebContent - js
and css. Include in them all (or only the necessary) jQWidgets files
- the scripts (including jqxcore.js and the specific widget files)
in js and the stylesheets (jqx.base.css and any themes
and associated images) in css. Remember to include a version of jQuery
in js, too.
5. Configure the Apache Tomcat Server
Apache Tomcat is an open source software implementation of the Java Servlet and JavaServer Pages technologies. We will be using Tomcat 8.0 in this tutorial. If you do not already have Apache Tomcat on your system, download it from here: http://tomcat.apache.org/download-80.cgi and install it. Then:
- In Eclipse, go to Window → Preferences. Choose
Server → Runtime Environments on the left:
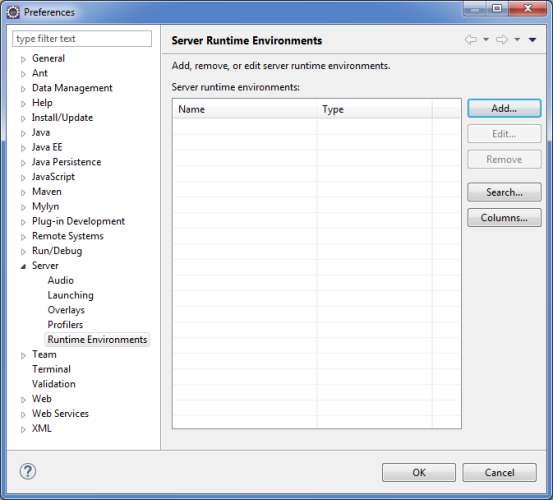
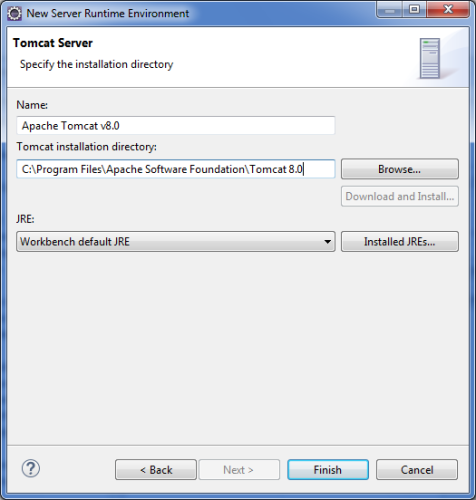
- Click Add. In the window that appears, choose Apache Tomcat
v8.0 and check Create a new local server:

- Click Next, browse for the Tomcat installation directory,
then click Finish and OK in the previous window:
- Right-click the project and choose Properties. In the Properties
window, select Project Facets on the left and then the tab Runtimes on the right. Check Apache Tomcat v8.0. Finally,
click Apply and OK.

6. Start the Server and Configure Its Classpath
- In the bottom panel of Eclipse, select the Servers tab.
- Right-click on Tomcat v8.0 Server at localhost and click Start:

- Go to Run → Run Configurations...
- In the pop-up window, select Apache Tomcat → Tomcat v8.0
Server at localhost on the left and then the Classpath
tab. Add the external JARs
mysql-connector-java-5.1.34-bin.jarandgson-2.3.1.jar:

- Apply the settings and click Close.
Your project is now set up and you can proceed with any of the following tutorials showcasing jQWidgets components loaded through JSP:
- Bind jqxListBox to MySQL Database using JSP
- Bind jqxTree to MySQL Database using JSP
- Bind jqxChart to MySQL Database using JSP
- Bind jqxGrid to MySQL Database using JSP
- jqxGrid with Server-side Sorting, Paging and Filtering Using JSP
- jqxGrid CRUD using JSP
- Bind jqxDataTable to MySQL Database using JSP
- jqxDataTable with Server-side Sorting, Paging and Filtering Using JSP
- Bind jqxTreeGrid to MySQL Database using JSP