jQWidgets Mobile PhoneGap Application for Android
PhoneGap is an open source solution for building cross-platform mobile apps with standards-based Web technologies like HTML, CSS and JavaScript. This tutorial will show you how to build a mobile app which features jQWidgets by using PhoneGap.There are two approaches to creating a mobile application with PhoneGap: local (using PhoneGap's Command-line Interface) and remote (using Adobe PhoneGap Build). This tutorial will show you how to create a PhoneGap app for Android through the Command-line Interface. To learn how to buld applications remotely, please refer to our PhoneGap Build tutorial.
1. Install PhoneGap
The first step to creating a mobile application using PhoneGap is to install it. As a prerequisite you will need Node.js, which you can download from http://nodejs.org/.
After you have installed Node.js, open Command Prompt and run the following to install PhoneGap:
C:\>npm install -g phonegap
You now have PhoneGap successfully installed and can invoke the phonegap
command on command line.
2. Platform Setup
Before building projects locally, you need to install SDKs for each platform you wish to target. In this case, install the Android SDK.
For PhoneGap command-line tools to work, you need to include the SDK's tools
and platform-tools directories in your PATH environment.
To modify the PATH environment on Windows:
- Open Windows Explorer, right-click on Computer, then click Properties.
- Click Advanced System Settings in the column on the left.
- In the resulting dialog box, press Environment Variables.
- Select the PATH variable and press Edit.
- Append the following to the PATH based on where you installed the SDK, for example:
;C:\Development\adt-bundle\sdk\platform-tools;C:\Development\adt-bundle\sdk\tools
Save the value and close both dialog boxes. - You may also need to enable Java
and Apache Ant. Open
Command Prompt and type
java, and also typeant. Append to the PATH whichever fails to run:
;%JAVA_HOME%\bin;%ANT_HOME%\binHere is how to set the JAVA_HOME and ANT_HOME variables:
- Go to Environment Variables as explained earlier.
- Under System Variables, click New.
- Enter the variable name as JAVA_HOME or ANT_HOME.
- Enter the variable value as the installation path for the Java
Development Kit or Apache Ant.
Note: If your Java installation directory has a space in its path name, you should use the shortened path name (e.g. C:\Progra~1\Java\jdk1.7.0_21) in the environment variable instead. Progra~1 stands for Program Files and Progra~2 - for Program Files(x86).
To be able to successfully install and debug your applications on an Android device, you would also have to:
- Set up the device for development by enabling its USB debugging option as explained in the article Using Hardware Devices.
- Install USB drivers.
3. Create a Simple App
Open Command Prompt again and type:
C:\>phonegap create jqwidgets-app -n jQWidgets-App -i com.example.jqwidgets-app
The create command creates a new project. The first argument specifies
a jqwidgets-app directory to be generated for your project. Its www
subdirectory contains your application's home page (index.html), along
with various resources under css, js, and img,
which follow common web development file-naming conventions. The file config.xml
contains important metadata needed to generate and distribute the application. The
other two arguments are optional: the com.example.jqwidgets-app argument
provides your project with a reverse domain-style identifier, and the jQWidgets-App
provides the application's display text.
By this moment, PhoneGap has created a basic app, which has been stored in the C:\jqwidgets-app\www directory. The app does nothing at this moment.
By adding/updating/removing files from the www directory, you can create
an app that suits your purposes. In the next step of this guide, we will create
a sample app that features jQWidgets.
4. Create a jQWidgets App
To create a jQWidgets mobile app, all you need is knowledge of HTML, CSS and JavaScript. PhoneGap provides an API for accessing a mobile device's data and binding to different events, such as the press of the back button. For a full overview, refer to the PhoneGap API Documentation.
In this step of the tutorial we will create a basic calendar app using jqxCalendar. When the user presses the menu button a bar will come up with three jqxButtons, through which the theme of the calendar may be changed.
Here is the updated version of index.html:
<!DOCTYPE html PUBLIC "-//W3C//DTD XHTML 1.0 Transitional//EN" "http://www.w3.org/TR/xhtml1/DTD/xhtml1-transitional.dtd"><html xmlns="http://www.w3.org/1999/xhtml"><head><title>A jQWidgets Mobile Application</title><link rel="Stylesheet" type="text/css" href="css/jqx.base.css" /><link rel="Stylesheet" type="text/css" href="css/jqx.darkblue.css" /><link rel="Stylesheet" type="text/css" href="css/jqx.orange.css" /><link rel="Stylesheet" type="text/css" href="css/jqx.ui-le-frog.css" /><script type="text/javascript" src="phonegap.js"></script><script type="text/javascript" src="js/jquery-1.11.1.min.js"></script><script type="text/javascript" src="js/jqxcore.js"></script><script type="text/javascript" src="js/jqxdatetimeinput.js"></script><script type="text/javascript" src="js/jqxcalendar.js"></script><script type="text/javascript" src="js/jqxtooltip.js"></script><script type="text/javascript" src="js/jqxbuttons.js"></script><script type="text/javascript" src="js/globalize.js"></script><script type="text/javascript" src="js/index.js"></script><script type="text/javascript">app.initialize();</script></head><body><div class="app"><div id="calendarWrapper" style="position: absolute; box-sizing: border-box; padding-bottom: 62px;width: 100%; height: 100%;"><div id='jqxCalendar'></div></div><div id="menu" style="display: none; position: absolute; bottom: 0; width: 100%;height: 62px; background-color: #E5E5E5;"><button id="darkblue" style="margin: 10px 10px 10px 0px;">Dark Blue</button><button id="orange" style="margin: 10px 10px 10px 0px;">Orange</button><button id="lefrog" style="margin: 10px 0px;">Le Frog</button></div></div></body></html>
There are references to the jQWidgets theme files, jQuery and the jQWidgets files
required for jqxCalendar. The file index.js contains the code of the
app's functionality. Note that you also need to add a reference to the file phonegap.js,
through which you can access PhoneGap's API, but you do not have to add it to the
scripts folder (js), beacause it will be automatically added while
the app is being built.
And here is how index.js looks in our example:
/** Licensed to the Apache Software Foundation (ASF) under one* or more contributor license agreements. See the NOTICE file* distributed with this work for additional information* regarding copyright ownership. The ASF licenses this file* to you under the Apache License, Version 2.0 (the* "License"); you may not use this file except in compliance* with the License. You may obtain a copy of the License at** http://www.apache.org/licenses/LICENSE-2.0** Unless required by applicable law or agreed to in writing,* software distributed under the License is distributed on an* "AS IS" BASIS, WITHOUT WARRANTIES OR CONDITIONS OF ANY* KIND, either express or implied. See the License for the* specific language governing permissions and limitations* under the License.*/var app = {// Application Constructorinitialize: function () {this.bindEvents();},// Bind Event Listeners//// Bind any events that are required on startup. Common events are:// 'load', 'deviceready', 'offline', and 'online'.bindEvents: function () {document.addEventListener('deviceready', this.onDeviceReady, false);},// deviceready Event Handler//// The scope of 'this' is the event. In order to call the 'receivedEvent'// function, we must explicity call 'app.receivedEvent(...);'onDeviceReady: function () {app.receivedEvent('deviceready');},// Update DOM on a Received EventreceivedEvent: function (id) {// initializes the calendar and menu buttons$("#jqxCalendar").jqxCalendar({ theme: "darkblue", width: 320, height: 320, titleHeight: 40 });$("#darkblue").jqxButton({ theme: "darkblue", width: 100, height: 40 });$("#orange").jqxButton({ theme: "orange", width: 100, height: 40 });$("#lefrog").jqxButton({ theme: "ui-le-frog", width: 100, height: 40 });// changes the calendar's theme on click of one of the buttons$("#darkblue").click(function () {$("#jqxCalendar").jqxCalendar({ theme: "darkblue" });});$("#orange").click(function () {$("#jqxCalendar").jqxCalendar({ theme: "orange" });});$("#lefrog").click(function () {$("#jqxCalendar").jqxCalendar({ theme: "ui-le-frog" });});// binds to the menubutton eventdocument.addEventListener("menubutton", this.onMenuKeyDown, false);},// menubutton Event HandleronMenuKeyDown: function () {$("#menu").fadeToggle("fast");}};
The deviceready event is essential to any PhoneGap application. It
fires once PhoneGap has fully loaded. Once it fires, you can safely make calls to
PhoneGap APIs. All functions and event bindings must be called in the callback function
of its event handler (onDeviceReady). The app binds to the menu button
click with the following handler:
document.addEventListener("menubutton", this.onMenuKeyDown, false);
The orientationchange event fires when the device's orientation has
changed from horizontal to vertical or vice versa.
There have also been some modifications to the config.xml file which
specify the author of the app and change the app icons and splash screens for Android
under different device resolutions:
...<name>jQWidgets-App</name><description>A jQWidgets mobile application.</description><author href="http://www.jqwidgets.com/" email="support@jqwidgets.com">jQWidgets Team</author>...<icon src="img/android_icon_36.png" /><icon src="img/android_icon_36.png" gap:platform="android" gap:density="ldpi" /><icon src="img/android_icon_48.png" gap:platform="android" gap:density="mdpi" /><icon src="img/android_icon_72.png" gap:platform="android" gap:density="hdpi" /><icon src="img/android_icon_96.png" gap:platform="android" gap:density="xhdpi" />...<gap:splash src="img/android_screen-ldpi-portrait.png" gap:platform="android" gap:density="ldpi" /><gap:splash src="img/android_screen-mdpi-portrait.png" gap:platform="android" gap:density="mdpi" /><gap:splash src="img/android_screen-hdpi-portrait.png" gap:platform="android" gap:density="hdpi" /><gap:splash src="img/android_screen-xhdpi-portrait.png" gap:platform="android" gap:density="xhdpi" />...
You can download the full source code of the sample here.
5. Build the Android Application and Install it on a Device
Once your code is ready, you can procede to compiling your app for a particular platform (in our case, Android).
First, go to the newly created project directory:
C:\>cd jqwidgets-app
To compile your app for Android type:
C:\jqwidgets-app>phonegap build android
The application is now compiled and its .apk file (jQWidgets-App-debug.apk)
can be found in the C:\jqwidgets-app\platforms\android\bin directory.
To install the built app on a properly cofigured and connected device (see Step 2) use the install command:
C:\jqwidgets-app>phonegap install android
You can also use the run command as a combination of build
and install. It also starts the application once it has been deployed
on the device:
C:\jqwidgets-app>phonegap run android
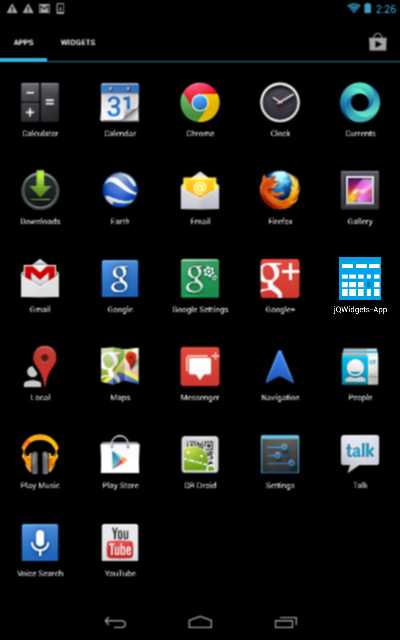
After the installation is complete, you can find the newly created app in the apps list of your Android device: