Implementing jQWidgets into an AngularJS SPA

In this tutorial we will show you how to implement jQWidgets controls into a single-page application (SPA) built with AngularJS. If you are unfamiliar with our previous tutorials which cover the basics of using jQWidgets with Angular, we suggest you take a look at them first before proceeding with this guide:
1. The Single-page Application
For our purposes, we will be using a ready-made AngularJS SPA, courtesy of Breeze.js. The app is called Zza! and represents an online pizza restaurant. You can download the example from here. Without going into unnecessary details, we will only mention that this SPA utilizes Breeze, Mongo, Express, Angular and Node. But don't worry, you would not need any previous knowledge of these frameworks to follow our guide. We will focus solely on the UI-part of the SPA and the jQWidgets implementation.
But first, make sure you run the project before we start modifying it. Here are
the steps to setting up the Zza! SPA (taken from the file
readme.md, included in the download):
When you run the SPA, you can see there are five views - Home, Order, Customer, About and Cart. We will modify the Order and Cart views and add some jQWidgets controls to them.
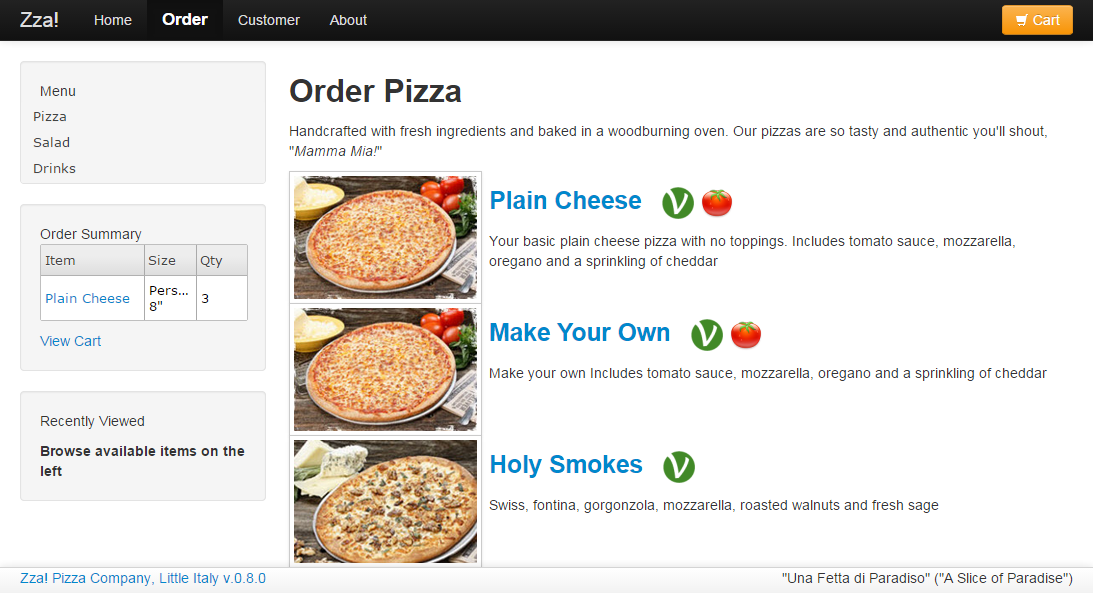
2. The Order View
Here is what the Order view looks like by default:

On the left there is a menu and underneath it - two tables, one for items added to the cart and one for viewed items. Our goal is to convert the menu to a jqxMenu and the tables to jqxDataTables.
2.1. Adding the jQWidgets files
First, we have to add the needed jQWidgets scripts and style sheets to our SPA.
We will be working with zza-node-mongo\client as our base folder. In
it, note the sub-folders app, css and lib.
In css we add a jqwidgets folder, containing:
jqx.base.cssjqx.web.css- the jQWidgets
imagesfolder, needed for the themes
And in lib we add:
jqxcore.jsjqxbuttons.jsjqxdata.jsjqxdatatable.jsjqxmenu.jsjqxscrollbar.js
The final step is to reference these files in the SPA itself, in the file index.html.
These are the links and scripts that are needed:
2.2. The Order Sidebar (orderSidebar.html)
In the file app\order\orderSidebar.html is the view that contains the
menu and two tables. We need to modify it in order to implement jQWidgets in this
view. Here is how we add the jqxMenu:
The menu items are list items, generated throgh the Angular directive ng-repeat. Notice the three custom directives we have here:
- ng-jqwidgets - designates the type of widget, e.g. jqxMenu;
- ng-jqxsettings - applies the object in its value as settings to the widget;
- on-render - raises and event showing that all the items of the widget with the given id have been rendered.
We will expand on these directives in Step 2.3. For now, here is the rest of the sidebar view, with the same custom directives approach applied to the two tables:
2.3. The Custom Directives
We will now define the aforementioned directives in a new file called jqwidgets-directives.js.
Create it in the folder app\directives. Here is the contents of the
directives file (for now):
The directive onRender fires a custom event, ngRepeatFinished when all items are rendered by ng-repeat. This is necessary because of the asynchronicity of ng-repeat - we only want to initialize our widget when all items have been loaded.
The ng-jqxsettings directive gets the widget's name from ng-jqwidgets, converts the settings string into an object and intializes the widget when the ngRepeatFinished event fires.
These directives are used by the three widgets we want on our sidebar. Here is how it looks after all the changes we have made:
3. The Cart View
The other view we will implement jQWidgets in is the Cart view. Here is its default look:
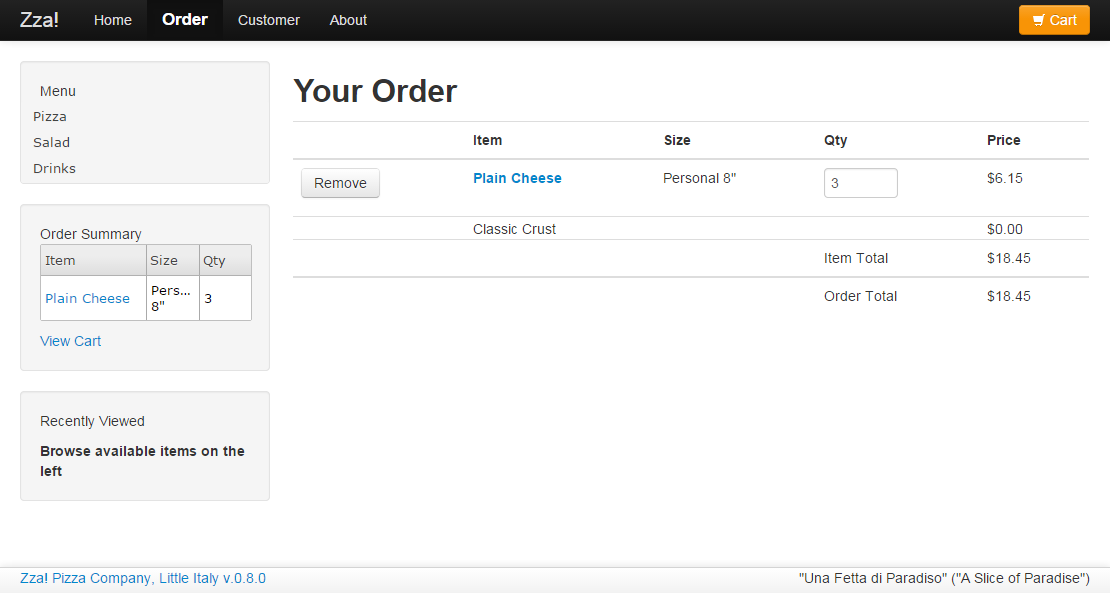
The file that controls the cart is app\order\cart.html, which we will
modify, so that the order details are shown in a jqxDataTable. Here is the source
code of the view after the modification:
As with the widgets in the Order view, this data table utilizes the custom directives
ng-jqwidgets and on-render (described in Step
2.3). The main difference here is that the cart data table does not
use ng-jqxsettings but another directive - ng-jqxsettings-cart.
For the sake of less code in our view, this directive has all the needed settings
pre-loaded. While this means the directive is specific strictly to this data table
instance (unlike ng-jqxsettings), the benefits are that the much larger code that
is needed for the cart table (including custom buttons rendering, aggregates, etc.)
does not clutter the html page and stays "behind the scenes". The code of ng-jqxsettings-cart
is given here (it, too, is implemented in jqwidgets-directives.js):
Like in the default look, the "Remove" buttons delete an item from the cart via the scope's method removeItem. The click functionality is applied to the buttons in jqxDataTable's rendered callback function. The total price of the order is calculated automatically by the data table aggregates from the columns "Quantity" and "Price". The following is a screenshot of the new cart look:
