Hot Towel SPA with jQWidgets
Hot Towel SPA is a Visual Studio template, which can be used for a rapid development of single-page applications (SPAs). A single-page application is a web application or web site that fits on a single web page with the goal of providing a more fluid user experience akin to a desktop application. In an SPA, either all necessary code – HTML, JavaScript, and CSS – is retrieved with a single page load, or the appropriate resources are dynamically loaded and added to the page as necessary, usually in response to user actions. The page does not reload at any point in the process, nor does control transfer to another page. Interaction with the single page application often involves dynamic communication with the web server behind the scenes.
Hot Towel SPA was created by John Papa and combines the functionalities of the following libraries:
- ASP.NET MVC 4;
- ASP.NET Web API;
- ASP.NET Web Optimization;
- Breeze.js;
- Durandal;
- Knockout;
- RequireJS;
- Toastr;
- Twitter Bootstrap.
You can learn more about the template on John Papa's website: http://www.johnpapa.net/hottowel/.
In this step-by-step tutorial you will learn how to successfully integrate jQWidgets into a Hot Towel SPA.
1. Download and Install the Hot Towel SPA Template
In this guide we will be using Visual Studio 2012 to create our Hot Towel SPA with jQWidgets. Download the Hot Towel template from the Visual Studio Gallery. Open the downloaded file and install the template.
If you are using Visual Studio 2013, download it from this link instead.
2. Create a New Hot Towel Project
In Visual Studio go to File→New Project. From the New Project window select ASP.NET MVC 4 Web Application, then click OK. In the next window, choose HotTowel SPA and click OK again:

The project has been created. If you run it, you will see the following page, containing only the default views - Home and Details:
3. Add a New View
We wil now add our own view, where our jQWidgets example will be. In the App\views
project folder create a new HTML page, called jqwidgets.html. Put the
following code in the new page (remove all other code):
<section><h2 class="page-title" data-bind="text: title"></h2></section>
In App\viewmodels add a new JavaScript file, named jqwidgets.js:
define(['services/logger'], function (logger) {var vm = {title: "jQWidgets Example",activate: function () {logger.log(this.title + ' View Activated', null, this.title, true);return true;}};return vm;});
Now we need to register our new view. In App\viewmodels\shell.js add
a new element to the routes array so that it looks like this:
var routes = [{ route: '', moduleId: 'home', title: 'Home', nav: 1 },{ route: 'details', moduleId: 'details', title: 'Details', nav: 2 },{ route: 'jqwidgets', moduleId: 'jqwidgets', title: 'jQWidgets Example', nav: 3 }];
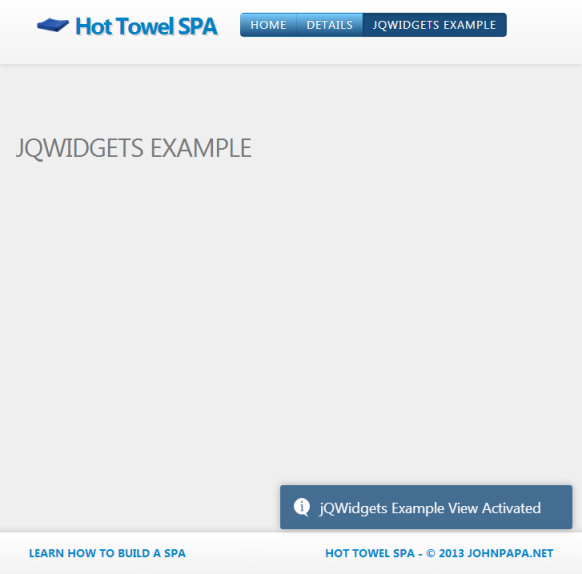
Run the project. You can now navigate to a third view, jQWidgets Example:
4. Add All Necessary jQWidgets Files
Before we proceed further with modifying the view we will need access to the jQWidgets library. Our example will include a data-bound jqxDataTable, a jqxInput and some jqxButtons.
In the project Scripts folder add a folder named jqwidgets
with the following files in it:
jqxbuttons.jsjqxcore.jsjqxdata.jsjqxdatatable.jsjqxdropdownlist.jsjqxinput.jsjqxknockout.jsjqxlistbox.jsjqxscrollbar.js
In a similar manner, in Content add a jqwidgets folder
with:
jqx.base.cssjqx.bootstrap.css- the jQWidgets theme images folder
The added files now have to be registered in the projects. Add references to each
one in App_Start\BundleConfig.cs:
bundles.Add(new ScriptBundle("~/scripts/vendor").Include("~/scripts/jquery-{version}.js").Include("~/scripts/knockout-{version}.debug.js").Include("~/scripts/toastr.js").Include("~/scripts/Q.js").Include("~/scripts/breeze.debug.js").Include("~/scripts/bootstrap.js").Include("~/scripts/moment.js").Include("~/scripts/jqwidgets/jqxcore.js").Include("~/scripts/jqwidgets/jqxdata.js").Include("~/scripts/jqwidgets/jqxknockout.js").Include("~/scripts/jqwidgets/jqxbuttons.js").Include("~/scripts/jqwidgets/jqxdatatable.js").Include("~/scripts/jqwidgets/jqxdropdownlist.js").Include("~/scripts/jqwidgets/jqxinput.js").Include("~/scripts/jqwidgets/jqxlistbox.js").Include("~/scripts/jqwidgets/jqxscrollbar.js"));bundles.Add(new StyleBundle("~/Content/css").Include("~/Content/ie10mobile.css").Include("~/Content/bootstrap.css").Include("~/Content/bootstrap-responsive.css").Include("~/Content/durandal.css").Include("~/Content/toastr.css").Include("~/Content/app.css").Include("~/Content/jqwidgets/jqx.base.css").Include("~/Content/jqwidgets/jqx.bootstrap.css"));
The scripts will be loaded when you run the SPA again.
5. Add a Data Source
We will get the data source for our project from one of the Breeze.js examples -
Breeze Todo.
Download Breeze + .NET samples from here: http://www.breezejs.com/documentation/download. Extract
the downloaded file and open the Samples\ToDo folder. From there go
to Todo\Controllers. Copy the file TodosController.cs
to the Hot Towel's Controllers folder. Then go to Todo\Models
and copy all three files there to our project's Models folder. Remember
to include the four new files in the project (right click on file→Include In
Project).
In order to be able to make Breeze queries in our project, we will need to install the Microsoft ASP.NET Web API 2.1 and Microsoft ASP.NET Web API 2.1 OData NuGet packages. To do so, in Visual Studio go to Tools→NuGet Package Manager→Package Manager Console and type in the console:
PM> Install-Package Microsoft.AspNet.WebApi -IncludePrerelease
When the installation has finished, type:
PM> Install-Package Microsoft.AspNet.WebApi.OData
Some final adjustments we need: in the file App_Start\BreezeWebApiConfig.cs
change the routeTemplate from "breeze/{controller}/{action}"
to "api/{controller}/{action}".
In Controllers\TodosController.cs remove the following line:
using Breeze.WebApi.EF;
6. Load the To-do List in jqxDataTable
Modify jqwidgets.js as follows:
define(['services/logger'], function (logger) {var vm = {title: "jQWidgets Example",items: ko.observableArray([]),manager: null,activate: function () {logger.log(this.title + ' View Activated', null, this.title, true);if (this.items().length > 0){return;}// Read functionalitythis.manager = new breeze.EntityManager("/api/todos");var query = breeze.EntityQuery.from("Todos").orderBy("CreatedAt");var me = this;return this.manager.executeQuery(query).then(function (data) {data.results.forEach(function (currentItem) {me.items().push({ Description: currentItem.Description(), IsDone: currentItem.IsDone() });});}).fail(function (e) {logger.log("Error Loading Items", null, this.title, true);});},attached: function (view) {$("#jqxDataTable").jqxDataTable({theme: "bootstrap",width: "400px",altrows: true,sortable: true,editable: true,columns: [{ text: "Description", dataField: "Description", width: 300, editable: false, columngroup: "toDoList" },{ text: 'Done', dataField: 'IsDone', width: 100, columngroup: "toDoList" }],columnGroups:[{ text: 'To Do List', align: 'center', name: 'toDoList' }]});return true;}};return vm;});
and jqwidgets.html like this:
<section><h2 class="page-title" data-bind="text: title"></h2><div class="row"><table id="jqxDataTable"><thead><tr><th>Description</th><th>IsDone</th></tr></thead><tbody data-bind="foreach: items"><tr><td data-bind="text: Description"></td><td data-bind="text: IsDone"></td></tr></tbody></table></div></section>
In the activate callback function, which is a Durandal lifecycle callback and is called when you have swithed to (activated)
your current view, a Breeze query retrieves all to-do items with their respective
descriptions and done states and sorts them by their time of creation.
Through Knockout-binding, the HTML table with id jqxDataTable is populated.
When the view has been attached to the SPA, in the attached
callback, the HTML table is used to initialize a jqxDataTable. Here is the resulting
view:

7. Create, Update, Delete
We will now implement the rest of the CRUD functionalities - Create, Update and
Delete (Reading from the data source was covered in Step 6). For
this purpose, our view will need further modifications and additions - jqwidgets.js:
define(['services/logger'], function (logger) {var vm = {title: "jQWidgets Example",items: ko.observableArray([]),manager: null,activate: function () {logger.log(this.title + ' View Activated', null, this.title, true);if (this.items().length > 0){return;}// Read functionalitythis.manager = new breeze.EntityManager("/api/todos");var query = breeze.EntityQuery.from("Todos").orderBy("CreatedAt");var me = this;return this.manager.executeQuery(query).then(function (data) {data.results.forEach(function (currentItem) {me.items().push({ Description: currentItem.Description(), IsDone: currentItem.IsDone() });});}).fail(function (e) {logger.log("Error Loading Items", null, this.title, true);});},attached: function (view) {$("#jqxDataTable").jqxDataTable({theme: "bootstrap",width: "400px",altrows: true,sortable: true,editable: true,columns: [{ text: "Description", dataField: "Description", width: 300, editable: false, columngroup: "toDoList" },{ text: 'Done', dataField: 'IsDone', width: 100, columngroup: "toDoList" }],columnGroups:[{ text: 'To Do List', align: 'center', name: 'toDoList' }]});var me = this;// Update functionality$('#jqxDataTable').on('rowEndEdit', function (event) {var args = event.args;var row = args.row;var rowIndex = args.index;var IsDone = row.IsDone === "true" ? true : false;var entities = me.manager.getEntities();entities[rowIndex].IsDone(IsDone);me.saveChanges();});return true;},// Create functionalityaddNewItem: function () {var value = $("#newItem").val();var entities = this.manager.getEntities();var entityId = entities[entities.length - 1].Id() + 1;var rows = $("#jqxDataTable").jqxDataTable('getRows');var rowId = rows[rows.length - 1].uid + 1;$("#jqxDataTable").jqxDataTable('addRow', rowId, { Description: value, IsDone: false });this.manager.createEntity('TodoItem', { Id: entityId, Description: value, CreatedAt: new Date(), IsDone: false });this.saveChanges();$("#newItem").val("");},// Delete functionalitydeleteItems: function () {var selectedRows = $("#jqxDataTable").jqxDataTable('getSelection');var entities = this.manager.getEntities();for (var i = 0; i < selectedRows.length; i++){rowId = selectedRows[i].uid;$("#jqxDataTable").jqxDataTable('deleteRow', rowId);entities[rowId].entityAspect.setDeleted();}this.saveChanges();},saveChanges: function () {if (this.manager.hasChanges()){this.manager.saveChanges().then(function () {logger.log("Changes Saved", null, this.title, true);}).fail(function () {logger.log("Error Saving Changes", null, this.title, true);});}}};return vm;});
and jqwidgets.html:
<section><h2 class="page-title" data-bind="text: title"></h2><div class="row" style="margin-top: 15px; margin-bottom: 15px;"><div>Add new item:</div><input id="newItem" type="text" data-bind="jqxInput: { theme: 'bootstrap', height: 24, placeHolder: 'Description' }" /><button id="add" data-bind="jqxButton: { theme: 'bootstrap' }, click: addNewItem">Add</button></div><div class="row"><table id="jqxDataTable"><thead><tr><th>Description</th><th>IsDone</th></tr></thead><tbody data-bind="foreach: items"><tr><td data-bind="text: Description"></td><td data-bind="text: IsDone"></td></tr></tbody></table></div><div class="row" style="margin-top: 15px;"><button id="deleteItems" data-bind="jqxButton: { theme: 'bootstrap' }, click: deleteItems">Delete selected items</button></div></section>
7.1. Create
When you type a new item in the input and click the Add button,
the addNewItem function is called, which adds a new row to the data
table and the Breeze entity manager. The changes to it are then saved through the
saveChanges function.
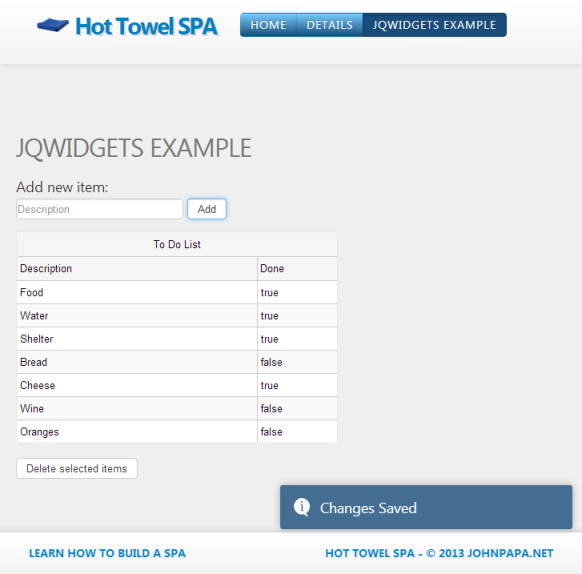
7.2. Update
The Update functionality is implemented through the data table's editing capabilities.
When an edit is complete, the event rowEndEdit is fired and the entity
manager updates the respective entity.
7.3. Delete
By selecting multiple rows from the data table and clicking the Delete selected
items, the function deleteItems is called, which deletes
the respective entities from the entity manager.
8. Download the Project
You can download the entire Hot Towel SPA with jQWidgets project from here.