jQWidgets Mobile PhoneGap Application for Windows Phone 8
In this tutorial you will learn how to create a simple mobile application that pinpoints a Windows Phone 8 device's location and shows it in a Google Maps instance situated in jqxTabs. You may also be interested how to create the same app for Android, BlackBerry 10 or iOS.
1. Prerequisites
To be able to develop a Windows Phone 8 application there are some requirements you must meet:
- Your operating system must be a 64-bit version of Windows 8 or Windows 8 Pro;
- The Windows Phone 8 emulator uses Hyper-V, which needs:
- 64-bit version of Windows 8 Pro or greater;
- A processor that supports virtualization and Second Level Address Translation (SLAT). See the list of Intel processors that support VT-x (virtualization) and EPT (SLAT);
- Enable the virtualization capability (i.e., VT-x on Intel) in your BIOS settings, as usually this is disabled by default.
- Your Integrated development environment has to be Microsoft Visual Studio 2012 Professional, Premium or Ultimate;
- Download the Windows Phone 8 SDK from the Windows Phone Dev Center website;
- To install your app on a Windows Phone 8 device or submit it to the Windows Phone Store, you need to register and pay for a Windows Phone Dev Center account. For more information, visit the Registration info page. Your device must also be registered. See How to register your phone for development.
2. Install Cordova
- Download Apache Cordova.
- Extract all files from the archive. Find and extract
cordova-wp8.zip, too. - Run the file
createTemplates.bat. It creates two template files -CordovaWP7_3_1_0.zipandCordovaWP8_3_1_0.zip. - Copy the file
CordovaWP8_3_1_0.zipand paste it in theC:\Users\your_username\Documents\Visual Studio 2012\Templates\ProjectTemplatesfolder.
3. Create a New Microsoft Visual Studio Project
To create a new Microsoft Visual Studio Project based on the Cordova template follow these steps:
- On the Start Page click New Project;
- Select Installed->Templates->Visual C# on the left side and choose CordovaWP8_3_1_0 from the list of templates. We will name our new project GeoLoc. Click OK to create the project.

4. Create the App
We will now modify the files in the www directory to achieve our desired
functionality. Here is the contents of the www folder after we have
added all the needed files:

Here is the source code of index.html in our example:
<!DOCTYPE html><!--Licensed to the Apache Software Foundation (ASF) under oneor more contributor license agreements. See the NOTICE filedistributed with this work for additional informationregarding copyright ownership. The ASF licenses this fileto you under the Apache License, Version 2.0 (the"License"); you may not use this file except in compliancewith the License. You may obtain a copy of the License athttp://www.apache.org/licenses/LICENSE-2.0Unless required by applicable law or agreed to in writing,software distributed under the License is distributed on an"AS IS" BASIS, WITHOUT WARRANTIES OR CONDITIONS OF ANYKIND, either express or implied. See the License for thespecific language governing permissions and limitationsunder the License.--><html><head><meta http-equiv="Content-Type" content="text/html; charset=UTF-8" /><meta name="format-detection" content="telephone=no" /><meta name="viewport" content="user-scalable=no, initial-scale=1, maximum-scale=1, minimum-scale=1, width=device-width, height=device-height, target-densitydpi=device-dpi" /><title>A jQWidgets mobile application, which demonstrates PhoneGap's Geolocation API.</title><link type="text/css" rel="stylesheet" href="css/jqx.base.css" /><style type="text/css">.label{font-size: larger;font-weight: bold;}</style><script type="text/javascript" src="cordova.js"></script><script type="text/javascript" src="js/jquery-1.11.1.min.js"></script><script type="text/javascript" src="js/jqxcore.js"></script><script type="text/javascript" src="js/jqxtabs.js"></script><script type="text/javascript" src="js/index.js"></script><script type="text/javascript" src="https://maps.googleapis.com/maps/api/js?v=3.exp&sensor=true&libraries=places"></script><script type="text/javascript">$(document).ready(function () {app.initialize();});</script></head><body><div class="app"><div id="jqxTabs"><ul style='margin-left: 20px;'><li>Location Map</li><li>Location Details</li></ul><div><div id="map" style="width: 350px; height: 320px;"></div></div><div><div id="details"><span class="label">Latitude: </span><span id="latitude"></span>;<br /><span class="label">Longitude: </span><span id="longitude"></span>.</div></div></div></div></body></html>
There are references to the jQWidgets main CSS file (jqx.base.css), jQuery
and the jQWidgets files required for jqxTabs. The file index.js contains
the code of the app's functionality. The last script reference is to the Google
Maps API.
Note that the app's initialization code is called in a $(document).ready()
function to make sure that all local and external scripts have been properly loaded
before the application itself initializes.
And here is the contents of the file index.js:
/** Licensed to the Apache Software Foundation (ASF) under one* or more contributor license agreements. See the NOTICE file* distributed with this work for additional information* regarding copyright ownership. The ASF licenses this file* to you under the Apache License, Version 2.0 (the* "License"); you may not use this file except in compliance* with the License. You may obtain a copy of the License at** http://www.apache.org/licenses/LICENSE-2.0** Unless required by applicable law or agreed to in writing,* software distributed under the License is distributed on an* "AS IS" BASIS, WITHOUT WARRANTIES OR CONDITIONS OF ANY* KIND, either express or implied. See the License for the* specific language governing permissions and limitations* under the License.*/var app = {// Application Constructorinitialize: function () {this.bindEvents();},// Bind Event Listeners//// Bind any events that are required on startup. Common events are:// `load`, `deviceready`, `offline`, and `online`.bindEvents: function () {document.addEventListener('deviceready', this.onDeviceReady, false);},// deviceready Event Handler//// The scope of `this` is the event. In order to call the `receivedEvent`// function, we must explicity call `app.receivedEvent(...);`onDeviceReady: function () {app.receivedEvent('deviceready');},// Update DOM on a Received EventreceivedEvent: function (id) {// create jqxtabs.$('#jqxTabs').jqxTabs({ width: 350, height: 350 });navigator.geolocation.getCurrentPosition(this.onSuccess, this.onError);},// successfully determined positiononSuccess: function (position) {$("body").append("Locaton set.<br />");var lat = position.coords.latitude;var lng = position.coords.longitude;$("#latitude").text(lat);$("#longitude").text(lng);$("body").append("Loading map...<br />");// initializes the mapvar myLocation = new google.maps.LatLng(lat, lng);map = new google.maps.Map(document.getElementById('map'), {mapTypeId: google.maps.MapTypeId.ROADMAP,center: myLocation,zoom: 15});$("body").append("Map loaded.");},// unsuccessfully determined positiononError: function (error) {alert(error.message);}};
Everything must be executed within the deviceready event handler, which
fires when Cordova has fully loaded. In the receivedEvent handler,
we initialize the tabs and pinpoint the device's location using the method geolocation.getCurrentPosition.
The callback function onSuccess is called when the location has been
successfully determined. The callback function onError is called when
there has been an error during location getting.
We also need to set some of the app's properties. To do so, open the file WMAppManifest.xml
in the Properties folder in Designer View:

In the first tab, Application UI, you may change the app's name, description, icon, supported resolutions, etc. Modify these however you like.
We need to make a change of one of the options in the Capabilities tab. Enable geolocation by checking the ID_CAP_LOCATION option:

Now that we have finished the application, remember to save all changes before continuing on to the next step, testing.
5. Testing the App
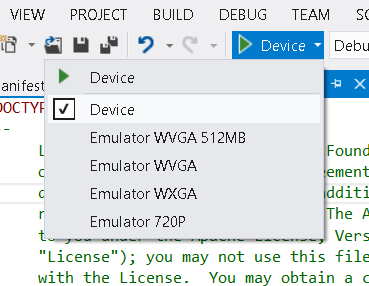
You can now test your app on the emulator or your Windows Phone 8 device. To do so, select Device:
Then start debugging the application (press F5). It will be installed on your mobile device and displayed onscreen:

Alternatively, select one of the emulator options and test the device locally.
You can download the entire GeoLoc project here.