Angular UI Components Documentation
Angular CLI with jQWidgets Grid
This tutorial will show you how to use Angular CLI along with the jQWidgets Angular Grid.
Please, follow the instructions below:
First we need to install the Angular CLI globally, so we can have it's commands available:
npm install -g @angular/cliNOTE: If you run the command from command prompt, make sure you run it as administrator.
Create an Angular CLI application:
ng new jqwidgets-angular-cli-appNOTE: Node.js version
After running "ng new jqwidgets-angular-cli-app".
If you have an older version of Node.js installed, you may get the following message:
You are running version v6.9.2 of Node.js, which is not supported by Angular CLI v6.
The official Node.js version that is supported is 8.9 and greater.
Please visit https://nodejs.org/en/ to find instructions on how to update Node.js.
- To resolve it, download the latest version of Node.js from https://nodejs.org/en/. Install it and run the command again.
Navigate to the application:
cd jqwidgets-angular-cli-appInstall the jQWidgets dependency:
npm install jqwidgets-scripts --saveBy now we have a fully working Angular CLI app. But we need to modify it abit so we can use the jQWidgets Angular Grid. Open the angular.json file and inside the styles property add this line:
"node_modules/jqwidgets-scripts/jqwidgets/styles/jqx.base.css"It should look like this:

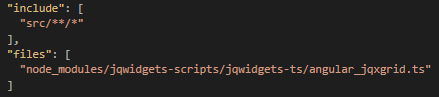
Now open the tsconfig.json file and add this at the bottom:
"include": [
  "src/**/*"
],
"files": [
  "node_modules/jqwidgets-scripts/jqwidgets-ts/angular_jqxgrid.ts"
]
It should look like this:
{
  "compileOnSave": false,
  "compilerOptions": {
    "baseUrl": "./",
    "outDir": "./dist/out-tsc",
    "sourceMap": true,
    "declaration": false,
    "moduleResolution": "node",
    "emitDecoratorMetadata": true,
    "experimentalDecorators": true,
    "target": "es5",
    "typeRoots": [
      "node_modules/@types"
    ],
    "lib": [
      "es2017",
      "dom"
    ]
  },
  	"include": [
	  "src/**/*"
	],
	"files": [
	  "node_modules/jqwidgets-scripts/jqwidgets-ts/angular_jqxgrid.ts"
	]
}
In the files section, we have the jqxGrid typescript file included. This is for the current example. We should add the Typescript files for each widget we are using.
Now when the configuration is done, time to write the application logic itself.
Navigate to src/app and edit the files:
app.module.ts
app.component.ts
app.component.html
Time has come to run the application. In the command line type:
ng serve
That can be resolved in two ways:
Add "src/app/app.module.ts", in the ‘files’ array in the tsconfig.json file":
"files": [
    "src/app/app.module.ts",
    "node_modules/jqwidgets-scripts/jqwidgets-ts/angular_jqxbargauge.ts"
]
The second way is: Go to src/app/app.module.ts, remove a random line, save the file, add back the line and run ng serve again.
Navigate to localhost:4200 and see the result:

A video tutorial is also available on YouTube: Tutorial: Fast and easy way to integrate jqxGrid in Angular project